You just landed your first freelance writing client. Fist-pump!
You’re excited and can’t believe someone will actually pay you to write. You can finally call yourself a freelance writer. But, with that excitement comes some apprehension.

You realize you need to know more than just writing to be a freelance writer.
They hired you, so now you have to act like you know what you’re doing. Invoices? No problem! Oh, you need my post to be SEO friendly? Easy peasy. Upload to your backend? I’m right on that.
Before you know it, you realize you need to know more than just writing to be a freelance writer.
Anxiety creeps in and you pray you don’t make a mistake when dealing with your new client.
Your Role As a Freelancer
Your clients hired you either to save them time and/or make them more money. For most small business, entrepreneurs and solopreneurs, time is a non-renewable resource. They can’t get it back.
So, they outsource basic tasks – like content writing – to free up their time to allow them to focus on the important things.
And when they ask you to write a post and submit it to them, they expect it to be properly formatted and done in the proper way.
Let’s look at three ways you can submit your work and what that looks like.
1. Upload to Their Content Management System (CMS)
Your client may want you to upload your post into their backend. If you’re lucky, it’ll be something you’re familiar with like WordPress – trust me though, it’ll probably be WordPress as no client would expect you to be familiar with a CMS that has a low market share.
When submitting your post in their backend, clients may also ask you to:
- Set up your author profile
- Set the Meta description
- Set their Yoast SEO
- Schedule the post
- Upload images and fill out the Alt tags
If you want to learn even more best practices, check out my complete course for new writers. I share these types of tips and more that will help you become a freelance writer.
2. Email
Most of your clients will probably have you submit your post as a MS Word document. It usually doesn’t get much easier that that. You provide the document, images and your author bio (if it’s bylined).
Just make sure you properly format your post. This means using styles and using proper line spacing.
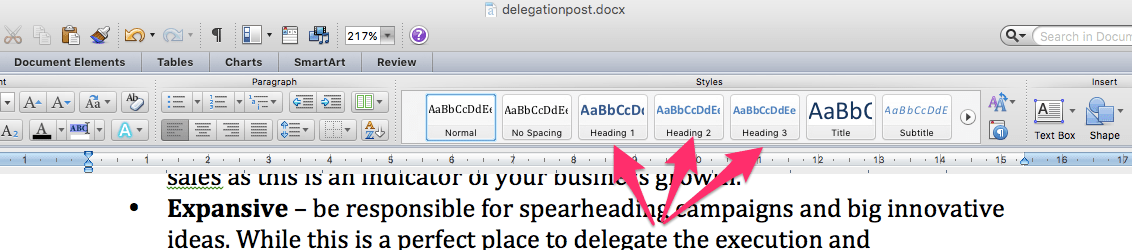
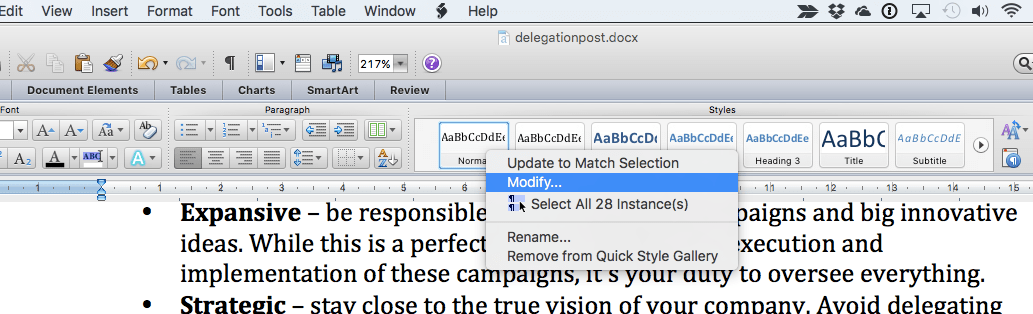
To make sure you have proper line spacing, right-click in the styles bar and click modify.
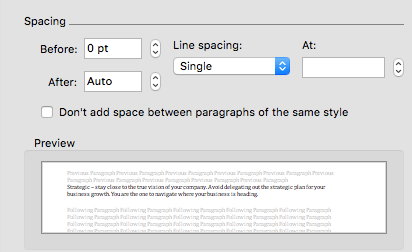
On the bottom left-hand corner, click on format and choose Paragraph. From there make sure your spacing is set to Auto (8 pt. if you are using Windows).
3. Sharing
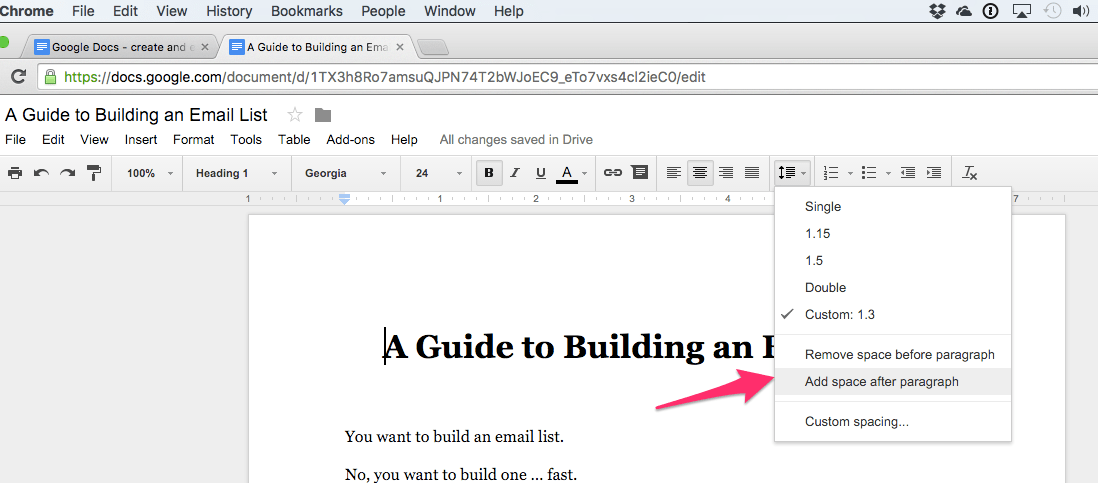
A popular way to submit your work is via sharing. You can do this with Google Drive. You write your post in Google Docs share with your client.
Just make sure you are using styles here too! Line spacing can be a bit cumbersome. After each sub-heading you have to set your line spacing to “Add space after paragraph.”
Important Points to Remember When Submitting Your Work Through Email
Clients appreciate when you email your work properly. It saves them oodles of time.
I recently got this email from a site owner:

So, let’s look at how we can email our work to our clients the right way.
1. Email Subject Line
For one-off submissions – guest posts, ad hoc projects, infrequent submissions – make your email subject line explicit. I tend to label my subject line, “Article submission” or “Blog post submission” and then the title of the post.
This makes it easy for your client to recognize it’s a new post since they may have a team of writers and are often getting tons of emails a day.
2. Author Bio
For bylined pieces it’s a good idea to provide your author bio when you submit your first piece to your client. And a good practice is to provide an HTML version.
If you have a WordPress site, you can just draft up your author bio and use the text mode of the post editor to grab the HTML version.
3. A Zip File of Your Optimized Images
For some of your writing pieces, you may have more than just one or two images in your post. For example, technical posts, digital marketing or WordPress based posts can have a lot of screenshots to enhance the content.
Instead of plopping them one by one in your email, it’s a better idea to compress your images in a zip file. Here’s how to make a zip file on Windows and Mac.
Look Like a Pro (Even If You’re a Total Newbie)
Doing these little things will definitely wow your clients and could lead to a recurring gig down the road.
Found this helpful? If you want a successful freelance writing business in the quickest amount of time and have the best outcome, consider enrolling in my course for new writers.
Over to you – what’s your primary way of submitting your work?


17 Comments